Wednesday, March 20, 2013

Computer Specs

One of the most common questions we field concerns computer technical specifications.  People often ask how they should equip and configure their next machine for digital photography purposes (often phrased as Photoshop or Lightroom purposes.)  So let's talk computers for one little post.


 Recent build in the LIGHT studio.

LIGHT recommends the current specs as an excellent configuration.  Off the side I will add comments and fall back positions.

Processor - Core i7 quad core.  We are currently using the Core i7 3770 at 3.4 GHz.  Although the two programs listed above perform best with a fast processor a good fall back position is found in the Core i5 3xxx options. We could go on a bit further regarding hyper threading or adding additional physical cores but we have not seen a huge requirement in typical digital photography needs.  If you push a bit beyond the ordinary with your work, take these into consideration.

Memory - 16 GB.  Most baseline systems these days are equipped with 8 GB of RAM but 16 will give you a nice performance boost.  There normally is no need to get the fastest clock speed RAM available unless you are also going to play games.  On the lower side, go with 12 and on the upper top out at 32.

Graphics - Dedicated video card.  There are a huge number of options here but start with an nVidia or ATI set with at least 1 GB.  You may be tempted to go with the higher end cards but you will not see a huge benefit unless you are working with video or gaming.  If you are thinking of running two or more high resolution displays you may want to upgrade as well. With all that said, the integrated graphics on the Core i5 and i7 (from 2500-4000) are pretty good.  You might be surprised how well they work.  The nice thing is you can always add a dedicated video card later if you need to.

SSD - Solid state drive for programs and speed critical data.  SSD prices have dropped significantly and the performance boost is really nice.  An SSD is not a must have but a majority of our clients enjoy the faster start up times and fast program launches.  At a minimum go with a 128ish GB drive.  You can go bigger (my laptop has a 512 GB SSD) but the drives will be a bit pricier.

Hard drives - At least two, one for data and one for scratch/working space.  Hard drive prices have come back down so we like at least 1 TB for storage and 320-500 GB for scratch.  Try for the 7200 rpm drives and if you want faster there are 10k and 15k rpm available. 

Ports - USB 3.0 and Thunderbolt.  Odds are you will connect external storage to your machine and you want it to be fast.  At the top of the list is the Thunderbolt connection, huge speed and flexibility but not as many peripheral/storage choices and much more expensive.  Not nearly as fast but almost ubiquitous and priced right, the USB 3.0 connection is a necessity. Definitely think about these options as one of the most frustrating things is waiting for your machine to communicate with external storage (Lightroom users especially.)

Fortunately, these specs are not too far out of reach for most folks.  Although you may pay a bit more for the system, configuring it properly will save you big in time and workflow efficiency.

 Pure fun building this little beast of a Photoshop machine.

For the somewhat adventurous, LIGHT recommends building your own system.  I recently built the computer shown in the pictures above for about $1275 and two hours of my time.  It has all of the options listed above and is unbelievably fast.  For those who may be thinking Thunderbolt and Windows?  My machine is Windows and has two Thunderbolt ports along with eight USB 3.0 and a handful of USB 2.0.  Depending upon how and when you source your parts the do it yourself option can save you quite a bit.  More importantly, the process forces you to learn about the options and make smart choices as to what is best for your needs and workflow.

Any questions, comments, concerns, or addtions add a comment or email me at hal@lightworkshops.com.

Fiat Lux!


Monday, February 4, 2013

Add Two Steps

Recently, we have seen an increase in photographers using the High Pass filter in Photoshop to add edge contrast and texture detail to their images.  This is a cool technique but when you use the filter remember to add two more steps; desaturate your layer before applying the High Pass filter and always target your filter effects with a mask.


You may have seen or heard many photographers talking about how they sharpen only on the Lightness channel in L*A*B* or they make sure to change the blend mode of their sharpening layers to Luminosity or they use the Fade option with a Luminosity blend mode change.  There are many good reasons to make these switches and we suggest you use them in your sharpening or contrast boost workflow.  For the same reasons, when you use High Pass desaturate.

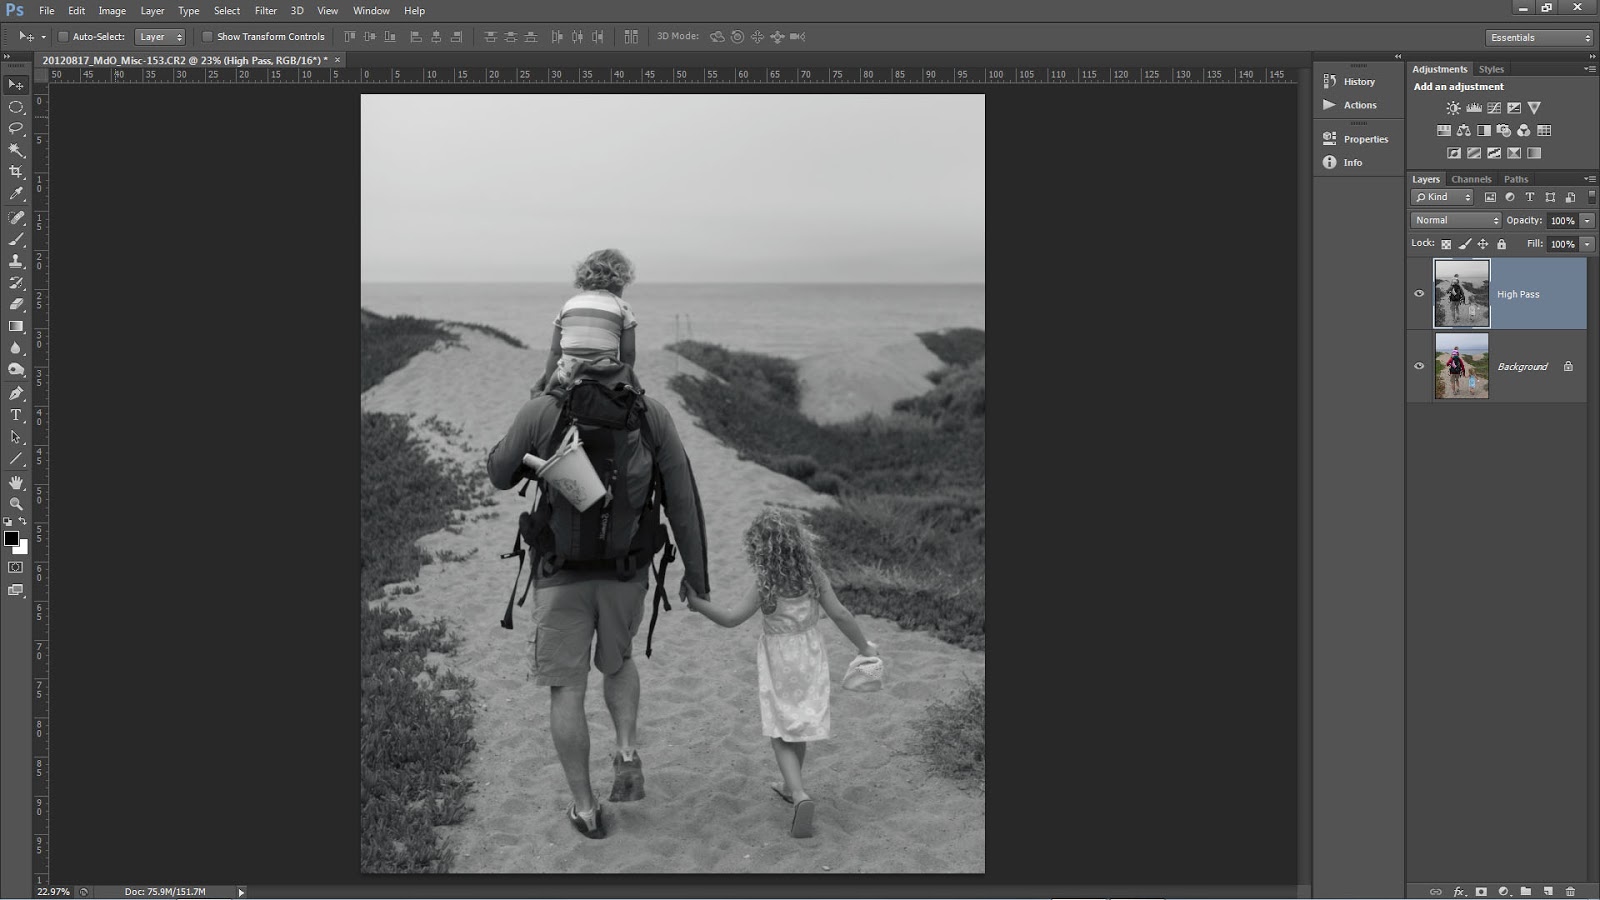
It is a common misconception that when you run the High Pass filter you are left with an image that is baseline 50% gray and only shows brighter or darker tonality at the edge contrast and texture detail.  Instead, High Pass may retain color information from the original image.  This can lead to color shifts or colored fringe along a high contrast edge similar to haloing.

 Notice the remaining color.
Our workflow is to copy the background layer or stamp visible if you have a multi-layer document and then desaturate via Image>Adjustments>Desaturate this can also be executed with the keyboard shortcut of CTRL+Shift+U for Windows or CMD+Shift+U for Mac.


For those who want to play or have more control you can
  • Run a Black and White adjustment instead and modify the tonality of the color arcs.
  • Use multiple layers of High Pass set to different radii.
  • Leave the color in your layer in order to generate a color boost. Watch out for fringing!
  • Use the filter on a Smart Object so you can make changes.
  • Invert your filter layer to decrease contrast and texture detail.
The second misconception is that areas that appear to be smooth after running the High Pass filter are not. Make sure to use a mask and target the filter effect to only those areas that you want to modify. In general, LIGHT does not recommend enhancing the edge contrast or texture detail on the following:
  • The sky especially blue sky.
  • Areas of constant color or tone.
  • Flowing water.
  • Out of focus areas.
  • Human skin especially female skin.

Fiat Lux!

Wednesday, January 16, 2013

2013 Metadata Presets Update

I am certain you have already done this but just in case you have not make sure to go in and modify your metadata presets.  This is also a great time to verify you made a new parent folder reflecting the new year.

In the quick video Hal shows the update process for Lightroom and the Bridge.
Annual Metadata Preset Update (2013 Version) from Hal Schmitt on Vimeo.

Tuesday, January 15, 2013

LR Videos Streaming Free

If you have not seen this announced yet, Elephorm is streaming Hal's Lightroom training videos free until the 31st of January.

We are biased but there is no better Lightroom training available and FREE for the next two weeks makes it even better.


Elephorm Lightroom


Have fun and Fiat Lux!

Saturday, December 22, 2012

Impromptu Flash Accessory for Holiday Family Portraits!

Packing for a Christmas or family holiday trip can be a bit hectic...sometimes you might even forget a modifier for your Speedlight.
Hal scooting with his homemade modifier.

Now what you are about to see is what we like to call "bush league" but the modifier/soft box works extremely well and you can definitely find the materials at grandma's house! Depending on the size of your flash you can also create any size you want.


For a very simple modifier here are the items you will need:

  • 2 plastic or paper plates (you can choose dinner plate size or a dessert platter depending upon the size of your flash and the "softening" power you want)
  • Gift box tissue paper (white is most most versatile but a colored tissue will be just like a colored gel)
  • Tape 
  • Scissors

All of the pictures below show the entire process. Start by cutting out the inside or flat portion of the plate. Try to keep as much of the cut out portion because you will use it later in the process. The ring you are left with is the frame for the modifier.


Cut or fold the tissue paper into a square about the same size as the frame/ring.  One piece will do just fine but if you want to make the light more even, add an additional layer or two.  It is always a trade-off though when you add layers.  The light becomes more even but you will lose more of the flash's effective power.  For example, when I made this example, I used four layers of tissue and lost approximately 2.5 stops of light.

Tape the tissue to the frame.  You can get all "gucci" with it but I used four pieces and have a nice, tight surface.


From the cutout portion of the plate, fashion a rectangle or two.  Put onto the end of your flash to act as an attachment collar.


With the other plate cut out two rectangular supports.  Tape one end of each to the attachment collar on the flash.  The final step is to tape the supports to the plate/modifier.  When you put the flash on your camera, I like to change the zoom to Manual at about 50mm.


Simple but effective.  When we talk about light's quality of being either hard or soft, the only factor that matters is the size of the light source relative to your subject (this is, of course, controlled by the size of the light source and the distance from the source to the subject.)  The bare surface area of the flash is @ 3.7 square inches.  After adding the "bush league" modifier the surface area is @64 square inches. That is an increase of 17X.  One of the biggest issues with many modifiers is they do not really change the surface area by that much. But 17X?  That is effective!

Another nice feature of this homemade version is it is extremely light.  Whenever you add an attachment to your flash, always consider weight.  If the modifier is too heavy or has a lengthy moment arm you can easily damage your flash.


Thursday, December 13, 2012

The Ultimate Stocking Stuffer


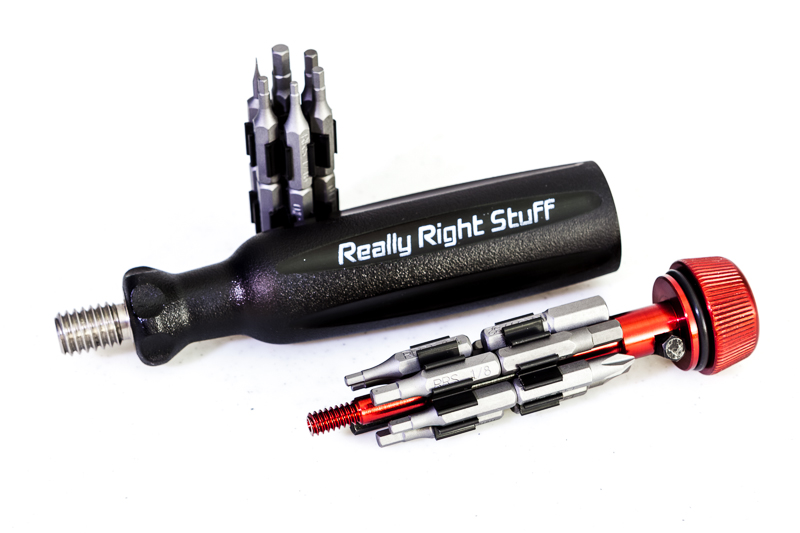
This is the ultimate stocking stuffer for any photographer.  Honestly, this is a multi-tool that everyone should have photographer or not. As you know I am very picky and demand my gear be the absolute best.  This multi-tool is the real deal.  The quantity and variety of bits in this kit is awesome.  I started using it about three weeks ago on my tripod but soon found out it works on just about everything from camera, to eye glasses, to computer, etc.  With 22 bits in hex, torx/star, flat, and cross this is my primary tool to adjust most small gear and equipment.


The entire kit packs very light and compact and is now a permanent addition to my bag.  For those who have a Really Right Stuff Tripod in either the 2 or 3 series the tool even fits right into the center column, so it is always available. There are other cool uses as well that you can check out if you follow the link below.


Really Right Stuff calls this the MTX and you should really have one.  Check it out at the following link MTX. 


For full disclosure, I am not paid to recommend this gear and the link above is not an affiliate link.  I use RRS because everything they make performs for me in the studio and in the field.

Fiat Lux,

Bull Schmitt

Wednesday, December 5, 2012


While I was looking over some images for yesterday's blog I found this sequence.  Thought it would make a nice simple time lapse.

Gorgeous Alaska day and a slow humpback whale dive.  Shot the sequence on my photo tour with a Canon 1D Mk IV and an EF 70-300 4.5/5.6L.

Put the time lapse together with Lightroom. Recommend the 720 quality option.