Thursday, September 8, 2011

A Great Tip from Wildlife Photography Specialist Juan Pons


Connecting with your subject

The most compelling photos are those that create a connection between your subject and your viewer. This not only applies to wildlife photography, but just about every other type, such as portrait, wedding, human interest, travel, Photojournalism, etc.

As the old cliché goes, “You never get a second chance to make a first impression”, so make sure your viewer connects with your image right from the get go.

The most effective way to create that connection is to maintain eye level with your subject, I am always amazed by how so many people will take images from a standing position without regard to their relative eye level to their subject. I see this all too often when judging competitions at local photo clubs.
Photo by Juan Pons
For example, a beginning photographer will go to a local park or botanical garden to shoot some of the very tame and accessible waterfowl on a local pond, they will stand at the bank of said pond and as the birds are accustomed to being fed, they will approach. While standing the photographer will let it rip and take a bunch of images.

Unfortunately most, if not all, of those images will be very uninspiring. Why? Because they will show the subject while you are looking down at it, with hardly any eye contact. Without that eye contact it will be very difficult for the viewer to make a connection to the subject of your image. Also we are all accustomed to seeing ducks and other waterfowl from a standing position. An image that presents an unusual or fresh view on a subject has a better chance of having an immediate impact on the viewer, hence a good first impression.
Photo by Juan Pons

Getting down low, very low, even lying down on the ground, to get at eye level is crucial in this situation in order to get an eye level shot.

In the two images shown accompanying this tip, I was in such a park, where the birds were tame and accustomed to humans. They would get very close looking for a handout.

I was lying down on the ground, with my lens on a beanbag getting shots as close to eye level as I possibly could. Being eye level to the Wood and Ruddy ducks present images of subjects that are engaged with the viewer and as such they are much more attractive and appealing; hopefully images that connect with the viewer.

We're excited to have Juan Pons as one of our instructors at this year's California Photo Festival, October 12-16, 2011! Juan will be here teaching wildlife photography, video DSLR techniques and more!
Click here to see all of Juan's festival events! 

Join us this year for the largest photography event on the Central Coast! Register today at www.CaliforniaPhotoFest.com

Get more tips from our festival instructors by visiting our California Photo Festival Page on Facebook!


Wednesday, September 7, 2011

Tethered Shooting Spacer

I have always found it a bit unwieldy when shooting in a vertical/portrait orientation with a tethering cable attached.  Recently, Really Right Stuff (RRS) made the perfect solution and I was fortunate to shoot with the Cable Release Spacer (CRS) today. 

The CRS attaches to a standard L-bracket and adds about 1.25" for your tethering cable.  It also has a small locking bar to "lock" your cable to the spacer.  This is great since any tugging on the cable can easily damage your camera's ports, a very expensive fix by the way.

Vertical orientation. The CRS firmly attaches to your L-bracket for stability.


 Horizontal orientation, not much change but cable is firmly attached.

If you are a tethered shooter and are tired of dealing with work arounds for your cable when shooting vertically, pick up a RRS Cable Relief Spacer and all is good.

Click here to visit the RRS site.

Fiat Lux!


Why Jennifer Wu Loves the California Photo Festival!


Canon Explorer of Light, Jennifer Wu, is an amazing instructor and has taught many workshops here at Light. She will also be joining us for a second year at the California Photo Festival, October 12-16, 2011!

Jennifer has shared her reasons why she can't wait for another year of teaching at the California Photo Festival and why you should join us for this incredible event!

Why do you enjoy teaching at Light and the California Photo Festival?
"I love teaching workshops at Light Photographic Workshops and the California Photo Festival. The facilities are great but even better is the supportive environment. We have fun and get in lots of great shooting as well."

Why should students join us for the California Photo Festival?
"The California Photo Festival is a blast. There is so much going on with plenty of interest for all types of photography. I have a great time leading the field workshops and giving the lectures. There is something for everyone at the event with so many different instructors who cover portraits, digital imaging and processing, wildlife and of course my favorite, landscape photography."
Image by Jennifer Wu.
Taken while teaching a workshop at Light. 

Click here to see a list of all of Jennifer's classes happening during this year's California Photo Festival. 

Jennifer will be on display at the Epic Light Gallery at Light Photographic Workshops starting September 30th. As well as teaching our Print Perfection workshops with Hal Schmitt and Barbara Ellison October 6-9, 2011.

Learn more about Jennifer by visiting www.jenniferwu.com

As the California Photo Festival quickly approaches we are getting more and more excited about hosting the largest photography event on the Central Coast!

If you would like to join us for the 2nd annual California Photo Festival this October, sign-up today at www.CaliforniaPhotoFest.com!


Fiat Lux!


Tuesday, September 6, 2011

Why Rick Sammon Loves Working with Light!

Recently we have spoken with several of our guest instructors about why they decide to come back to the Central Coast and teach at Light Photographic Workshops. 

Canon Explorer of Light, Rick Sammon, is a popular guest instructor here at Light, as well as our Keynote speaker for this year's California Photo Festival. Here are his thoughts on why he enjoys teaching at Light Photographic Workshops and why you'll enjoy attending one of our fantastic digital photography classes. 

Why do you enjoy teaching at Light?
"I enjoy teaching at Light for three reasons: One, the picturesque setting is ideal for creative photographers. Two, the students are dedicated to serious learning and serious fun (we have a lot of fun after hours). Three, I learn from the other instructors."

Why do you think students will enjoy learning digital photography at Light?
"Light offers a unique combination of shooting in a wonderfully peaceful setting that gets the creative juices flowing. What's more, the small class size is unique among workshops."


Image by Rick Sammon. 3 shot HDR
Shot with the Canon 5DII and Canon EF 15mm Fisheye lens.
Taken during the "Exploring the Light" workshop
at Light Photographic Workshops.
We're happy to have Rick Sammon joining us for this year's California Photo Festival, October 12-16, 2011! Rick will be teaching a variety of topics including HDR, Social Media Marketing, Lighting and more. 

Click here to see the full list of Rick's festival events!

Learn more about Rick at www.ricksammon.info

Visit www.CaliforniaPhotoFest.com to see our incredible line-up of instructors and all the events happening at this year's California Photo Festival!

Wednesday, August 31, 2011

Back in Cali

Great to be back home after a somewhat wet, windy, and no electrical power trip out east.  The school has been busy working the California Photo Festival and I am very impressed with the work the staff has done.  Should be another killer week of fun, photography, and learning. 

Even though Irene let loose with an unreal amount of rain I was able to make some interesting images over the four days I was in New York.

The following images are from a little indoor HDR trip just down the road from Rick's place.

3 Shot HDR with Nik's HDR Efex Pro

 
Same 3 Shot HDR with HDR Soft's Photomatix Pro

I often use multiple methods to process my HDR and then pick the best option.  Of course, there are times I pick and choose different parts to use from different finished images.  Whether using Layer Blend Modes or Layers/Masks, there is no limit to what you can do.

The B&W Effects conversion, for giggles.

All shots are from a Canon 7D and an EF 14mm f/2.8L.  I processed initially in Lightroom and then sent to the respective plug-ins.

Fiat Lux!

Monday, August 29, 2011

Topaz B&W Effects Available Tomorrow

Topaz will release B&W Effects tomorrow.  It has been fun as part of their beta test group.  What has been even better is they made quite a few changes based on input we submitted.

I think this is a strong entry into the black and white conversion market.  There are some good features you will not find other places.  I am a big fan of the brushes for local adjustment to tone, detail, smoothness, and color.

I should have some tutorials up soon and hopefully a webinar on B&W Effects in September. 

Baby humpack having fun.


The day was very muted so with little color to begin with
black and white seemed a natural option.


B&W effects will be on the page tomorrow.
Fiat Lux!

Sunday, August 28, 2011

Slow Shutter/Waterfall Tips with Rick Sammon

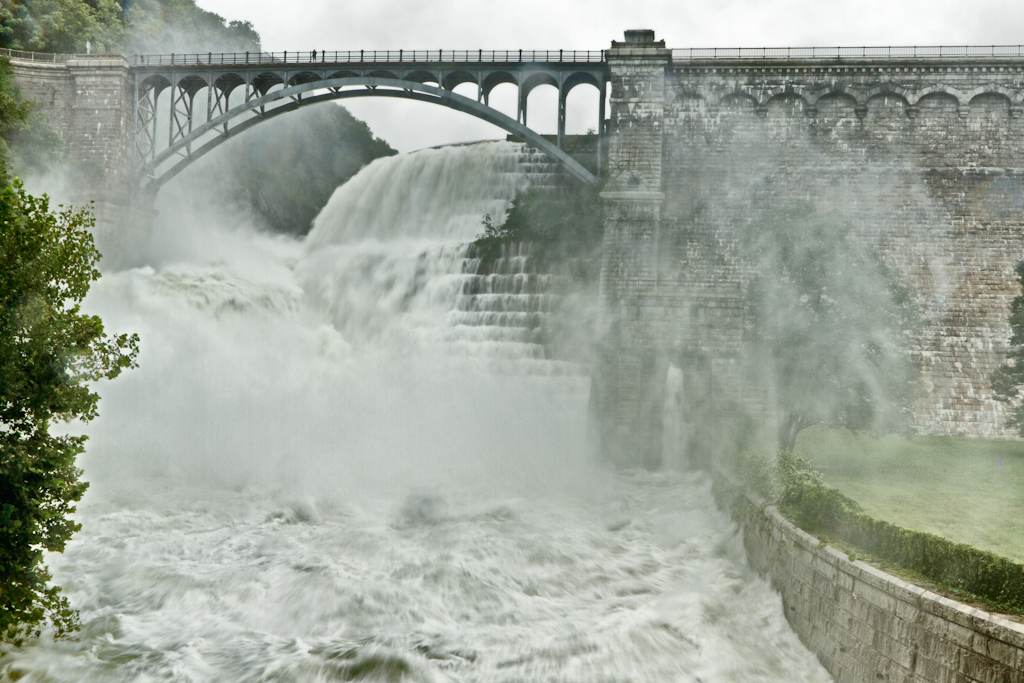
New Croton Dam, NY
I am in New York this weekend with Rick Sammon.  Hurricane/Tropical Storm Irene just passed through the area.  My discussion in NYC was cancelled so we spent the day shooting around Croton-on-Hudson. 

We recorded a quick video discussing the top slow shutter speed and waterfall photography tips.  Rick and I, along with Juan Pons and Jennifer Wu, did a battle of the sunset photo tips last year at the California Photo Festival (2011 California Photo Fest) so we thought we would do a smaller version.


The top tips on the video, and one or two more, were:

1.  Use a tripod for stability.  When shooting slow a tripod allows you to keep everything solid except for the moving water.

2.  Use your cable release or camera's timer.

3.  Bring a neutral density filter or polarizers.

4.  Use live view.

A small "stream" that had popped up as a result of Irene.

5.  Reference live view's magnification frame to act as an expanded spot meter for perfect exposure.  I normally place the frame over the brightest area of the water I am trying to blur.  This area is normally (but not always) the shot's highlight and drives the overall exposure.

6.  After the shot reference your histogram to make sure the exposure is tight.

7.  Target half a second as your shutter speed.  As water speed changes you may need more or less.

8.  Keep a lens cloth and absorbent cloth nearby to wipe your lens and LCD.

9.  Maintain your SA (situational awareness,) always look behind you to make sure you are not missing a great shot.

Those were just a few we thought of on the spot in beautiful Croton-on-Hudson, NY.

 Same as above but with "enhancement." Took the image to Silver Efex and then blended the result using the Luminosity blend mode in Photoshop.

Check out a bunch of cool tips at Rick Sammon's blog here.

Fiat Lux and see you at the California Photo Festival!