TIP: How to Get Rid of Chromatic Aberration / Jane Conner-ziser
Chromatic Aberration, in simple terminology, is when the
colors in a digital file do not line up correctly and you can see color
“fringing” around the edges of objects in your picture, mostly in places where
a dark object is next to a light one. This is caused when the lens fails to
converge all of the colors to a single focal point due to different wavelengths
– and it can be exaggerated if there is movement during the capture process.
Sometimes chromatic aberration occurs only in specific areas
of a file, but sometimes, like in this sample, it occurs throughout the image
and correcting it can become a big job!
SO, in this article I will share with you the most common
options for getting rid of chromatic aberration, starting with the easiest;
Adobe Camera Raw or Lightroom.
Both ACR and Lightroom have options in the Lens Correction
Panel that address chromatic aberration.
If the aberration is slight, all it takes is some visual
adjustment of the sliders and choosing the defringing option that provides the
best visual correction. Finite. Done – but it didn’t work on this image because
the aberration is too severe.
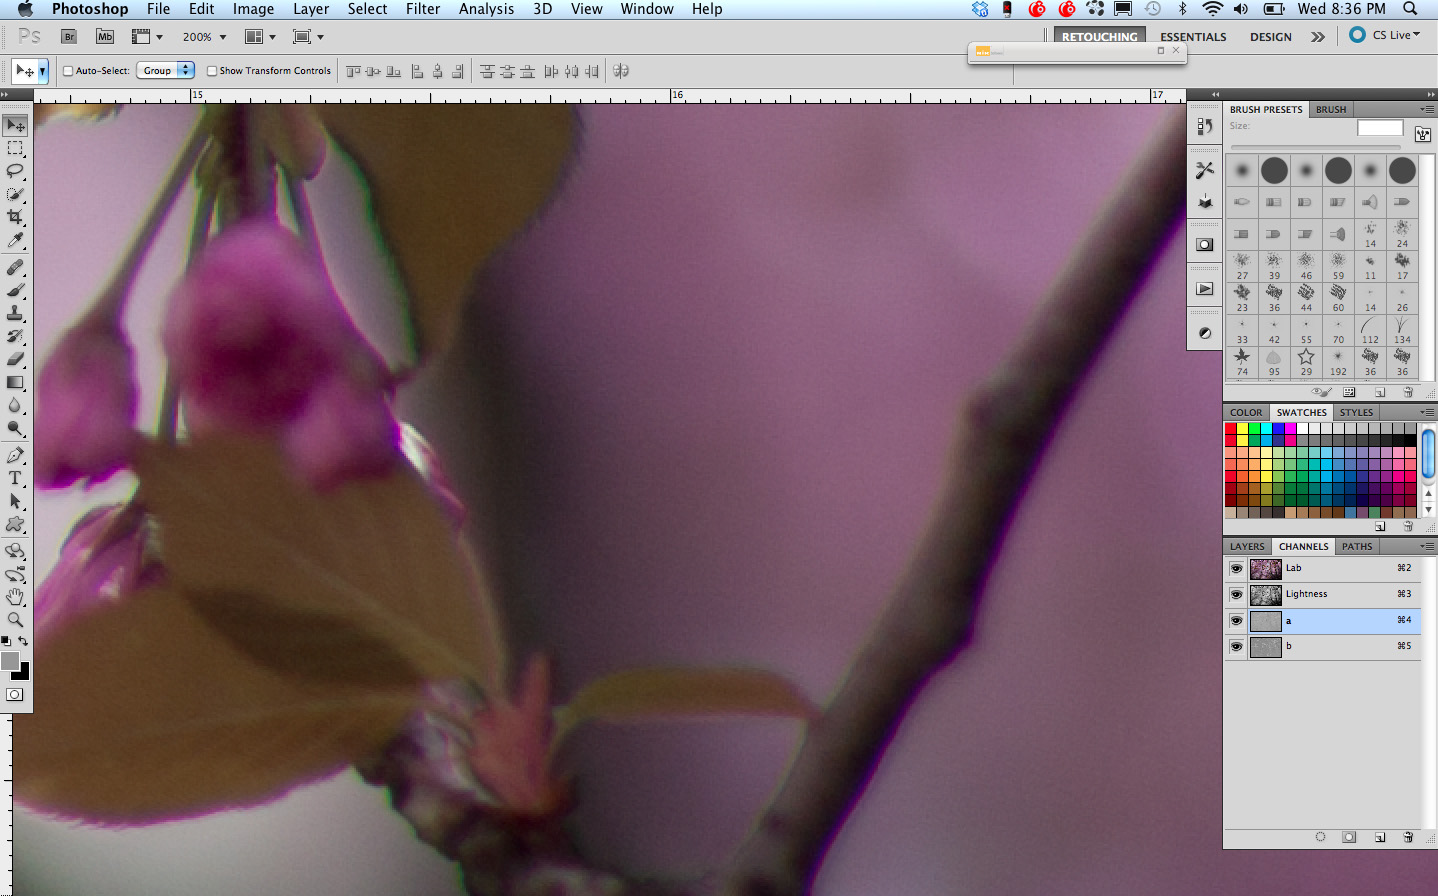
The next option is to consider that the problem is that the
color channels are not lining up correctly and perhaps there might be an
adjustment that can be made in Photoshop to realign them. There are two options
for this. The first involves opening the Channels Window, clicking on a color
channel plus the visibility icon (eyeball) on the RGB channel and using the
Move Tool to realign the color channels, matching the edges of your image.
This worked well in some areas, but not in others. It is
possible to distort (transform) the separate channels … but you must keep in
mind that image clarity is easily affected – which brings us to the second
color channel option, changing the Image Mode to Lab Color first (Image / mode
/ Lap color) in order to separate the luminosity (detail and value) of the file
from the colors. Once the adjustment has been made, return the file mode to
RGB.
Unfortunately, this option didn’t do very well on this file
either! We will be forced to take care of this the old fashioned way –
correcting it by hand, one edge at a time. It’s going to take longer but the
results will be perfect – here is how you do it:
Make a New Layer and change the Layer Blending Mode from
Normal to Color. Choose the Brush Tool and set the opacity to 50%; use a small
sized brush (this image was done with the brush size at 5 pixels, just large
enough to cover the discolored edges). Hold down the Option (Alt) key to choose
the neighboring color, then simply color over the one you want to change. Apply
a few coats, reselect, and continue throughout the image. It is faster than you
think and the results are worth it!
I dropped in a neutral gray layer under my paint and am
showing the color layer in Normal Mode so you can see my work:
The total of my work looks like this:
And the detail looks like this:
The job took just under an hour once I decided upon my
strategy, and you can see how important it is to know your software! Options
are important when you’re doing real world retouching because you want to get
your work done as quickly as possible, but no two images are alike. Always
start with the quick option, but learn a variety of ways of doing things so you
won’t find yourself stumped on an important image that just has to be better.
This image was going to be printed as a 6 foot mural, part
of a three image display with two other images that did not have the same
problems as this one so it was really important that the work was perfect and
would hold up to the enlargement. I’m so happy to say that everyone was
pleased! Awesome!
Thank you for letting me share this project with you!
Jane Conner-ziser is an internationally recognized expert in
ACR, Lightroom, Photoshop and Painter. She is an author, portrait retouching
artist, painter and instructor living in Ormond Beach, Florida. She has been
actively involved in professional photography for over 25 years. Contact Jane
at Light Workshops
www.lightworkshops.com or through her websites
www.janeconner-ziser.com and
www.jczphotographics.com