
 David Wells, one of our leading festival instructors at the California Photo Festival this year gave us a great article on something a lot of travel photographers have to go through. We hope you enjoy and come to learn more at his sessions in October!
 I work a lot in the developing world, partly because my wife is from India. Before we met, I was also working a lot in the nether-reaches of the globe because personal projects and paying work took me there.
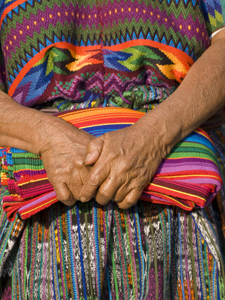
 A friend just asked me if I had any tips he could incorporate into his working process as he heads off to Mexico. The challenge for me in writing this blog was not coming up with advice but rather with figuring out how to explain those things that I do almost automatically when I am photographing in places like India, Guatemala, Vietnam or Turkey.
Half of the preparation involves gear, planning and other logistics which is the easiest to define and write about.
The other half is about attitude and behavior.
In some ways it is more important than the gear issues, but it is also harder to define and then write about.
 First, get camera insurance. Make sure it covers you around the globe. Be careful about add-ons to your current home owners insurance. The first thing your insurance company will do if you file a claim is google your name and see if you are a professional. I did just that for the friend who asked the question that prompted this blog. Sure enough, he shows up in Linked-in as a pro so.... The insurer will then point out how 99% of all policies do not cover pros and then you are stuck. I have blogged on The Wells Point about the types of insurance you should carry so I will direct you to that.
 I have seen many people who put black tape or use a black marker to cover the name the camera. I don’t actually do that. I would get rid of the screaming logos on the camera straps. I would encourage you to do that and get straps that are as supportive as possible. I have blogged about why I use Black Rapid straps, which is simply because they solve my particular set of problems. I tend to walk with two cameras, one on each shoulder. When I am moving they are usually pulled together with one hand so they gather in front of my gut. I use a kind of a fanny pack but it is always turned in FRONT, not in back. I usually wear some simple cotton shirts that I have custom made in India. They are thin cotton which helps in the hot weather. They are also extra wide at the waist so they can easily be pulled over the fanny pack. When I am in “stealth” mode, I look extra wide (fat) but much of my gear is hidden away.

As I am walking I usually turn the lenses inward rather than outwards. I do that as much to avoid hitting things as to prevent problems. Also, kids LOVE to touch shiny lenses, so having them turned in keeps the lenses finger print free. I stay away from lens vests or anything else that screams pro. I work very hard to look like a round middle aged Western tourist. I frequently use a pair of simple canvas/cotton bag that was a gift from my mother in law. Putting one inside the other means I have one main pocket and two side pockets. I have a huge advantage over many people in that I use smaller simpler cameras, my Olympus OMDs. If I had something like a Canon 5D or one of the giant Nikon DSLRs I am not sure what I would do (except maybe buy a smaller camera for traveling.) You can read about my general travel and image archiving approach at BHPhotoVideo Part 1 and BHPhotoVideo Part 2

I usually wear shorts inside, but I am careful not to dress inappropriately when I am out walking on the streets. There people will stare, especially at foreigners, doubly so foreign women. Think of it this way, if you want to connect with people it makes them more comfortable to wear clothes that are not too different from what they know. Because some of the streets are a little gross, I have taken to wearing the newer sandals which can be hosed down if I step into something less than desirable.
I use two cameras for many reasons, including the fact that changing lenses or flash cards takes a lot of concentration so I try to avoid doing that in the middle of a public place. Two small cameras, like the Olympus OMDs generates some curiosity, but not as much as a 5D with a giant lens and an even more threatening lens hood. I would definitely lose (or minimize the use of) the giant butterfly lens hoods, especially on the longer telephoto lenses. Those are threatening to people on the other end of the camera and they suggest “pro” to a potential thief.
 The key to working in the developing world, in my experience is what is often called “situational awareness.” Obviously it means being aware of what is going on around you, both in terms of things to photograph and potential problems. While I am constantly looking around to see what is happening, I also take clues from the people around me. The classic example of this is when I am doing night photography I will photograph in a night market until it starts to empty out. When the locals go home, I do as well. Similarly, when the locals step back because a loud, drunk or annoying person is coming, I follow their lead.
I never use an iPod or any kind of music player when I am working. Never. There are too many things going on around me to pay attention to. Zoning out with music is the surest way to get into trouble (or just miss great picture.)
My first step when something looks like it may go wrong is to make eye contact with the person in question. 99.9% of the time they are curious, want to be helpful, want to sell you something or are begging. I see them, they know that and that gives them pause. I try to smile too. It makes a world of difference. Usually that is enough.
The next step is to subtly turn my body so as to block them and protect my gear. After that I pull all my gear in closer to me. The last step is to move on to another location. No photo is ever worth the potential safety issue so, I move on and to date I have been very, very lucky. The process of extracting myself from a situation that I am unsure of usually means nothing more than stepping out of the situation, ideally so I end up with my back against a wall.
 I pause, reassess the situation and most times I will dive back in.
 Again, I always make eye contact with the people involved, smiling as much as I can.
India is one place where people’s faces seem to default to what looks like a scowl but as soon as I smile they usually warmly smile back. With my back against a wall I also might pause to change lenses or flash cards but again, by having two cameras I can usually avoid doing that. Keep in mind that over 90% of crimes are what are called crimes of opportunity, which just means the criminal sees an opportunity and acts.
If you make eye contact, they usually move on. If they see that you are confident, mentally present and have high situational awareness, they will skip you. Mostly they will look for the next fool who is daydreaming and that person will (sadly) become the hapless victim. In that horrible situation where your are directly confronted with a weapon and obvious harm, I have been told over and over give up the gear and not argue, even for a moment.
 That is the plan that I hope I will be disciplined enough to stick to if that ever happens but....
I was recently photographing a street food stall selling piping hot Kebabs. After ordering and eating a portion (mmmm) I spent about 45 minutes there photographing and making videos. During that time, I showed the back of the camera to at least half a dozen people so they saw what I was doing. I also made instant Polaroid Pogo prints for the three main subjects I was photographing. I made eye contact with a couple dozen people, most of whom were curious (and harmless.) One kid got too close to my camera so, after making eye contact and waving my hand telling him not to touch my camera and he persisted, I gently pushed his hand back. By the time I left, the entire group (the workers and the customers) were having a conversation and a good laugh at the crazy American. The Kebab tasted great and I had supported their business. The video and stills were equally good. They felt as if I had treated them respectfully. All my gear was intact. It doesn’t get much better that that.

Continue your travels with David here at the California Photo Festival October 10-14 where he will show you how to study the light, create as story with your images and improve your photography success stories!
Thanks David!


